Tried & tested some new babies from fentybeauty & eyeshadow palette from Pixi Beauty ♥️
My humble thoughts 💭 below with products used:
1) First Aid Beauty 🥥 coconut priming moisturizer
-hydrates, brightens,gives a nice glow & smells 😋 delish
2) fentybeauty Pro Filt’r Soft Matte Longwear Foundation
- i want to love it, but it’s not the best for my dry skin type. True to it’s name, it’s very matte & shine-free, so you guys with oily/combo would love it!
For me, it kinda clung onto my dry areas after a while🙁 BUT, i love how lightweight & comfortable it feels on the skin while giving great coverage, so i would highly recommend this to those who has oily/combo skin type🙏
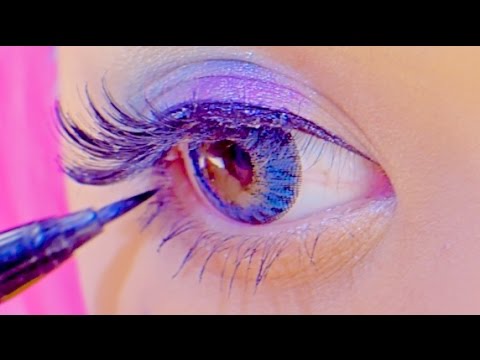
3) fentybeauty Pro Filt’r Instant Retouch Concealer
-it’s creamy & light, easy to blend, covers dark circles, love it!!♥️
4) fentybeauty Pro Filt’r Instant Retouch Setting Powder
- i like this too!! (Packaging so beauts btw🌝) It feels airy & weightless, sooo smooth on the skin & sets makeup so well, doesn’t over dry the skin☺️
5) Pixi Beauty Eye Reflection Shadow Palette Natural Beauty
-Nice neutral brown shades, pigmented, easy to blend. Nothing to complain! And it won’t burn your wallet🌝
6) fentybeauty mattemoiselle Plush Matte Lipstick in Single
-ugh, love fenty lipsticks. Colors are sooo nice, suits all skin tones! Single is one of my favs♥️
7) fentybeauty diamond bomb
- it’s the shimmery glittery highlighter to turn heads🌝 Use fingers for most intense results 💎 ✨
8) Urban Decay Cosmetics All Nighter Setting Spray
-love love. Featured this a lot of times already, so u guys know the deal💜
.
.
#beauty #fentybeauty #fentyconcealer #pixibeauty #makeup #makeuptutorial
#urbandecaycosmetics
同時也有4部Youtube影片,追蹤數超過180萬的網紅Venus Angelic Official,也在其Youtube影片中提到,Subscribble ♥ http://bit.ly/1tZ3Kh TIP: Use red colour for a daring but natural look! :D Have fun cuties! Don't you love that healthy, well hydrated ...
「how to blend eyeshadow with fingers」的推薦目錄:
how to blend eyeshadow with fingers 在 Venus Angelic Official Youtube 的最佳解答
Subscribble ♥ http://bit.ly/1tZ3Kh
TIP: Use red colour for a daring but natural look! :D Have fun cuties!
Don't you love that healthy, well hydrated look you get after a hot shower? Too bad it doesn't last longer! Mulgwang, which is Korean and translates to "Water Glow" is a makeup technique that will get you an after shower look that lasts all day long! Are you ready get bright, glowing skin without noticing the use of makeup? Well I sure am! Let's
Use a toner and cotton pads to freshen up your pores and control sebum. Press the cotton pad softly on your skin and gently swipe upwards. Always handle your skin with sensitivity to avoid irritations.
Next I'll cleanse my face with a moisturising foam and then soak it up by gently pressing a soft towel on my skin. I recommend using foam washes bas they cleanse deeply without being harsh.
For the "Wet Skin Look" it's important to give your skin a good amount of moisture. I will stick on these adorable Rosehip Oil pads on the dryer parts of my face and let my skin absorb all the moisture.
Once you ensured that your skin is well hydrated, let's move on to the Mulgwang makeup!
Get a pink tone corrector and a volumiser
, in my case a sun screen! Brush on some tone corrector and mix it up with enough moisturiser of your choice to cover all parts of your face, diminishing the dark spots for an even complexion.
Now get your bestie the volumiser, and your everyday foundation. Squirt out half the amount you would normally use and add moisturiser to 2/3 of the concealer.
Mulgwang Formula: 1/2 Concealer + 2/3 the
By using a volumiser like that you will actually need to use less makeup while taking care of your skin.
The colour part of the makeup will be applied in a similar way. Choose either your favourite oil, in my case apricot oil, orgood old vaseline. Today I will show you how to use both. Scrape off some eyeshadow in a neutral brown colour and if you're using oil, one tiny drop is enough to create a liquid eyeshadow. Now, apply the colour on your eyelids and blend using your fingers.
e. If you want, apply the eyeshadow colour on the sides of your nose, cheekbones, jaw and forehead for some contouring.
f. Rouge and lips w/ Vaseline
Now let's try vaseline! Scrape off some rouge colour and mix it with a pea sized amount of vaseline. Apply the same colour on your cheeks and lips as this looks the most natural, especially with pink. If you want to be more daring then try a nice shade of red!
e. If you own a liquid shimmer, dab some of it on the corner of your eye to make them look wider.
Although Mascara helps enlarging your eyes, one or 2 layers are enough to get the effect while fitting into the no makeup makeup look.
○●○●○●○●○●○●○●MY SOCIAL MEDIA○●○●○●○●○●○●○●○●
☆★☆ Instagram ☆★☆
Venus_Angelic
☆★☆ Facebook ☆★☆
http://www.facebook.com/venusangelic
☆★☆ Stalk & Talk On Twitter ☆★☆
http://twitter.com/venusangelic
☆★☆ Tumblr ☆★☆
http://venusangelic.tumblr.com/
--------------------------------------------------------------------------------------------------------------
how to blend eyeshadow with fingers 在 KAWAII PATEEN Youtube 的最佳貼文
KAWAII♥PATEEN SKILL-UP #22
Trendy KAWAII MAKEUP TUTORIAL GAL(gyaru) Style
by fashion model Arisa Kamada
- 鎌田安里紗今時ギャルメイク講座 -
Arisa Kamada is a regular model for the Japanese fashion magazine RANZUKI, specialized in “Gyaru” style.
Arisa was our first host on Kawaii Pateen but now she shows us her tips and tricks to achieve GAL-style makeup.
—
Tokyo Street Fashion KAWAII♥PATEEN
_Have fun with Fashion!_
Everything kawaii, Street fashion snaps, makeup tutorials and reports on fashion events in TOKYO!!
On Facebook with tons of photos :
https://www.facebook.com/Tokyo.Street.Fashion.KAWAII.PATEEN
Official site : http://waoryu.jp
------------------------------
Hello, this is Arisa Kamada.
Today, I'm introducing cute and modern Gal "gyaru"makeup.
Let's start.
Starting from base makeup.
This has base and the foundation combined together, making it possible to make base makeup with just this.
As thin base makeup is in style now, putting it little by little, not making it too heavy.
Spreading with fingers, not using brush or anything.
Avoiding irregular surface for the whole face.
Dark circles tend to appear around the eye, so putting double layer will make the face brighter
Using the sponge, blending in to the skin.
When there are no irregular parts, it is ok.
Erasing the dark circles and dimple marks using the concealer.
Once around the eye gets dark circles, it will change the look of the finished makeup, so I'm keeping it bright as possible.
The nostrils tend to have too much makeup so keeping this on will keep the makeup from coming off.
Putting concealer on the bridge of the nose will make the nose look higher
so doing this from the base will change the impact on the finish.
Straightening the skin with this powder.
Putting too much will make the skin too thickly painted, so keeping it small.
Puffing enough where the makeup tends to remain will adjust the makeup.
Drawing the eyebrows .
This can be used as nose shadow, but I'm using it on my eyebrows.
Not making it too heavy, more like just placing the color on top.
Having drawn the shape of the eyebrows, adjusting it with the pencil.
Pencil is used to add some eyebrows to the corner.
Drawing it to fill in the space between the eyebrows.
The key is not making it too thick.
Using eyebrow mascara, straightening it.
Key is going against the flow of the eyebrows and not along it.
Applying it against it will make it blend in totally and change the color nicely.
Adjusting this flow again.
The eyebrows is done.
Coloring the cheeks.
Mixing orange and pink is "in" now, and it's easy to mix these two colors for the cheek.
Taking right in the middle here, mixing pink and orange.
Putting it on the high point under the eye, in sideways.
Adding to the highest point of the cheekbone will make a modern makeup.
The cheek color is the key, so I'm applying pretty heavily.
Putting the highlighter.
There are 3points for the highlighter. First is the bridge of the nose.
Putting on the bridge to make the nose look higher.
Next is putting here under the eye some highlighter.
Making the face impression brighter, putting here also.
The final key is putting here under the chin.
This makes the face light up quite a bit.
Using this eyebrow brush for nose shadow.
Mixing the dark and light color together and putting thin lines to the nose bridge.
Drawing as if connecting with the eyebrows will make it look natural.
Adding thick lines where the nose and the eyebrows meet will give a nice shadow.
Blending it in with the finger will give the final touch.
Starting the eye makeup.
Using this brown eyeshadow to draw.
Pink eyeshadow is "in" now, so I'm using this one up here.
Applying it all over the eye hole.
Putting it in a wide area.
Changing to a thinner brush.
Using this thin brush to paint the bottom eyelid.
Widely from the inner corner to the outer corner.
Connecting with the upper shadow will make it look natural.
Before, making a gradation was popular, but using single color is "in" now, so that's it for the eye shadow.
The eyeline.
Using thin brush will enable clean lines so that is my recommendation.
Starting from the middle.
Next, the corner of the eye.
Having in mind not to make the lines too thin, drawing as if to fill in between the lashes.
Final touch is the corner lining like the shape of the eye and streching going a little downward
Pulling the eyelid up a little and filling in between all of the eyelids.
This eyeline filling makes the eyes look wide.
Using the eyelash curler to pull up.
Clamping from the very root and pull up strongly.
Clamping again around the center and giving it some angle.
Next, the mascara.
Putting quite less of the mascara since the fake eyelashes will be put later on.
The bottom eyelashes being easy to put on, starting from the upper lashes.
how to blend eyeshadow with fingers 在 KAWAII PATEEN Youtube 的最佳解答
紅林大空派手メイク|Kawaii big eyes FLASHY COLOR MAKEUP TUTORIAL How-to by Japanese designer Kurebayashi
Color Contact |I-LENDS - Super World GREEN(スーパーワールド グリーン)
Base|MAIHADA - SUMIHADA CC Cream 01(米肌 澄肌CCクリーム) [https://amzn.to/2KcrjTT]
Concealer|CALYPSO - MAGIC CONCEALER(マジックコンシーラー サーモンベージュ) [https://amzn.to/2lsEt4h]
ETVOS(エトヴォス) ミネラルシルキーベール SPF20 PA++ 7g[https://amzn.to/2Wpm78o]
EyeShadow|Eyeshadow Palette MEP-120#01(アイシャドウパレット MEP-120#01) [https://amzn.to/2K9k6DS]
セザンヌフォーカラーラメシャドウ02[https://amzn.to/2Kaw5Ec]
キャンメイク アイニュアンス21 ロイヤルブルー 3g[https://amzn.to/30Smo2U]
セザンヌ 極細アイライナーR 00 ブラウンブラック 0.75ml[https://amzn.to/30PD9vH]
KAWAII♥PATEEN SKILL-UP #15
FLASHY COLOR big eyes MAKEUP Tutorial
by fashion designer Haruka Kurebayashi
- ファッションモデル紅林大空のカラーメイク講座 -
Big eyes are not enough, you need color, and a lot of it! This is what this tutorial is for★
Haruka Kurebayashi is a famous model of the magazine KERA and well known among the fans of Japanese fashion overseas. Since last year she also participates to the popular Harajuku fashion walk with very colorful and eccentric fashions.
She is the designer of the brand 90884 and presents her latest product at the end of the video!
-------------
First you apply the CC Cream
Spread it out evenly
With CC Cream, you could cover up the uneven skin color or roughness of the skin, so it is a useful item
Next, I will use the concealer
I will apply the concealer under the eyes where it is likely to become dark or have shadows, and on the corner of the eyebrows. It does not look good to have marks after you shave your eyebrows so I will apply it just in case
This will also be applied on scratches, freckles and pimples.
On the side of the nostrils
On the bottom corner of your mouth
When you apply it to the rough part of your face, it will make your face look brighter and healthier
Just like this
I will now put foundation powder
This is the finishing touch, so lightly tap it in.
Having applied CC Cream, you do not need to cover it up so much. If you apply too much, it may crack, so just add a thin layer
I will now put in blue contact lenses
The contact lenses for flashy makeup should not be ones with clear edges, but ones which the color gradually blends in and is brightly colored
I will use COLOR to draw eye shadow
When you do flashy makeup, it would be better if you have a variation of colors to choose from, so you should either use a color palette with many colors, or have your favorite colors stacked up in your collection to use
Today the color of my hair is pink, so I will use green
Put some on your fingers…… and apply a big amount
I have already put quite some amount, sticking out a little
I will use pink directly over the green, giving it another layer
Right around the center of the eye, apply pink to the double eyelid
It would make sort of a gradation of color
Use brown eye shadow to give shadow to the bottom corner of the eye
Use the darkest color to give some shadow
The key here is, the shadow here should go along the eye bags in a round shape up until one third the length of the eye
Add color to the eye bags using cream color
The reason why I use cream color is, with white, it is too bright, and when using makeup with many colors, the white will stand out too much, so I need to use cream color with glitter to let it blend in
I will use the eye liner
Use the black liner to circle around
The thickest line is toward the middle, and the corner of the eye should be going upward
Next we will put the fake eyelashes
Move a little to the corner side of the eye and stick it
As you can see, the corner of the eyelashes should be facing a little downward
We will use this type of eyelashes
This flamboyant fake eyelash with quite an amount of bundle of hair I had cut myself .I will put it on around the center of the eye towards the corner of the eye. To give more volume to this area, I should paste it like this
I will now use two mascaras
To give the lower eyelashes more volume, this is the mascara for the bottom line.
It is the mascara for extension
After this I will apply a normal mascara
The base of the mascara is transparent
After you apply this to the whole face,
Let it dry a little
Apply
When the base is done enough, the extension works much better
Just as you see
When you put on the base, it will extend enough that you don’t need to add on the bottom eyelashes
Let us draw the shadow of the eyelash using this eye liner
When you use flashy colors, it will make the colors blur, so using one black color here will make the eyes stand out
Up to around the pupil of the eye, add in short and minute strokes.
Oh, I leaked out. More short strokes
Now, I would like to draw my eyebrows
I will use light pink
Take the pink with a brush and add little by little to the inner corner of the eye
As the nose line is like this, try to paint it going closer to it and draw your eyebrows
The part to draw your eyebrows is, start tracing the top line of the eyebrows, draw straight and let it flow